
The Chemex is an iconic brewing method celebrated for its simplicity and elegance, yielding clean, bright coffee․ This guide helps you master the process, ensuring perfect results․
Discover how to unlock your coffee’s full potential with the Chemex, a timeless brewer designed for enthusiasts seeking a refined, manual brewing experience at home․
1․1 Overview of the Chemex Brewer
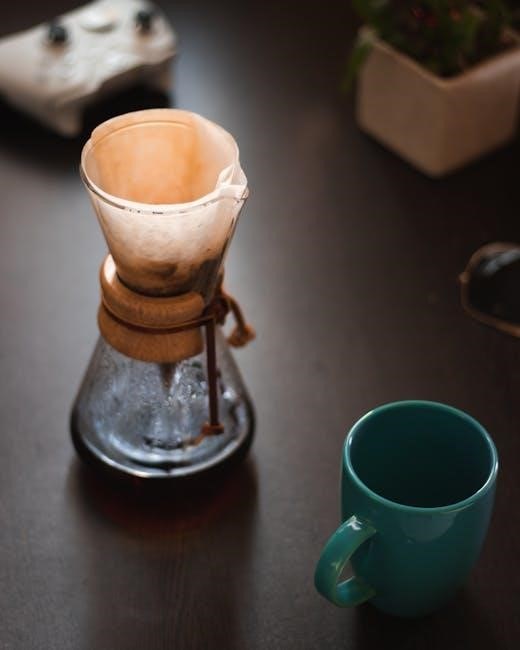
The Chemex is an iconic, manual pour-over coffee brewer known for its sleek, hourglass-shaped design․ It consists of a thick glass container with a single-piece glass neck that acts as a spout․ The brewer uses paper filters, which are folded and placed inside the glass container to separate the coffee grounds from the liquid․ This unique design allows for a clean, balanced extraction of flavors, resulting in a smooth, full-bodied coffee․ Its simplicity and elegance make it a favorite among coffee enthusiasts, while its durability ensures long-lasting use․ The Chemex is particularly praised for its ability to highlight the nuances of medium and light roast coffees, making it a versatile tool for both beginners and experienced brewers․
1․2 Importance of the Brew Guide
A well-crafted brew guide is essential for mastering the Chemex brewing process․ It provides step-by-step instructions to ensure consistency and optimal flavor extraction․ By following a brew guide, coffee enthusiasts can avoid common mistakes, such as incorrect water temperature or improper filter placement, which can significantly affect the taste of the coffee․ The guide also helps in achieving the perfect coffee-to-water ratio, a critical factor in brewing․ Additionally, it offers tips on grind size and blooming, which enhance the overall quality of the brew․ Whether you’re a novice or an experienced brewer, a detailed brew guide serves as a valuable resource to refine your technique and enjoy a perfect cup every time․
Preparation for Brewing
Preparation is key to a perfect brew․ Gather fresh water, high-quality beans, and your Chemex with filters․ Heat water to the ideal temperature and set up your equipment properly for a smooth brewing process․
2․1 Ingredients and Equipment Needed
To brew with a Chemex, you’ll need a few essential ingredients and tools․ Start with fresh, high-quality coffee beans, filtered water, and a Chemex-specific square filter․ For equipment, you’ll need the Chemex brewer itself, a grinder (preferably a burr grinder) to achieve the ideal grind size, a kettle for heating water, and a scale to measure the coffee and water accurately․ Optional but helpful tools include a thermometer to ensure the water reaches the perfect temperature (around 205°F) and a timer to monitor the brewing process․ Having all these components ready ensures a smooth and successful brewing experience․
2․2 Heating Water to the Ideal Temperature
Heating water to the ideal temperature is a critical step in the Chemex brewing process․ Aim for water between 195°F and 205°F, as this range ensures optimal extraction․ Start by boiling fresh, filtered water in a kettle․ Once boiling, let it cool for about 30 seconds to bring it down to the desired temperature․ For precision, use a thermometer to monitor the temperature closely․ Preheating the Chemex brewer with a small amount of hot water before adding the filter and coffee grounds is also recommended to maintain stability during brewing․ Proper temperature control is essential for achieving even extraction and a flavorful cup of coffee․
2․4 Folding and Placing the Chemex Filter
To prepare the Chemex filter, start by unfolding it and identifying the side with three layers․ Fold the filter in half with the three-layered side facing outward․ Place the folded filter into the Chemex brewer, ensuring the three-layered side aligns with the spout․ This positioning prevents uneven extraction and ensures proper water flow․ Gently rinse the filter with hot water to remove any paper taste and preheat the brewer․ After rinsing, discard the excess water․ Properly folding and placing the filter is essential for even extraction and a smooth brewing process․ This step ensures the coffee grounds are evenly saturated during brewing, leading to a balanced and flavorful cup․
The Brewing Process
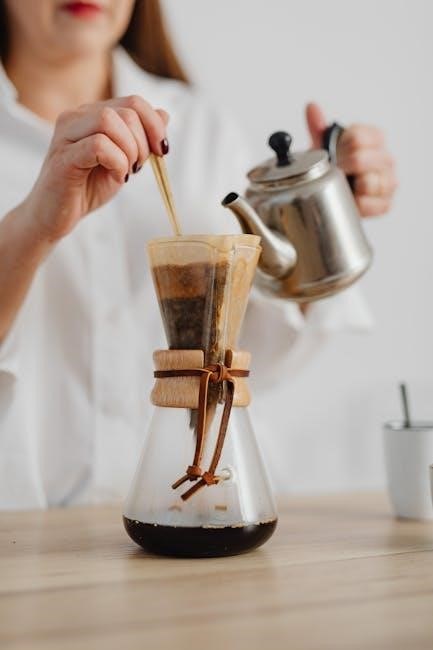
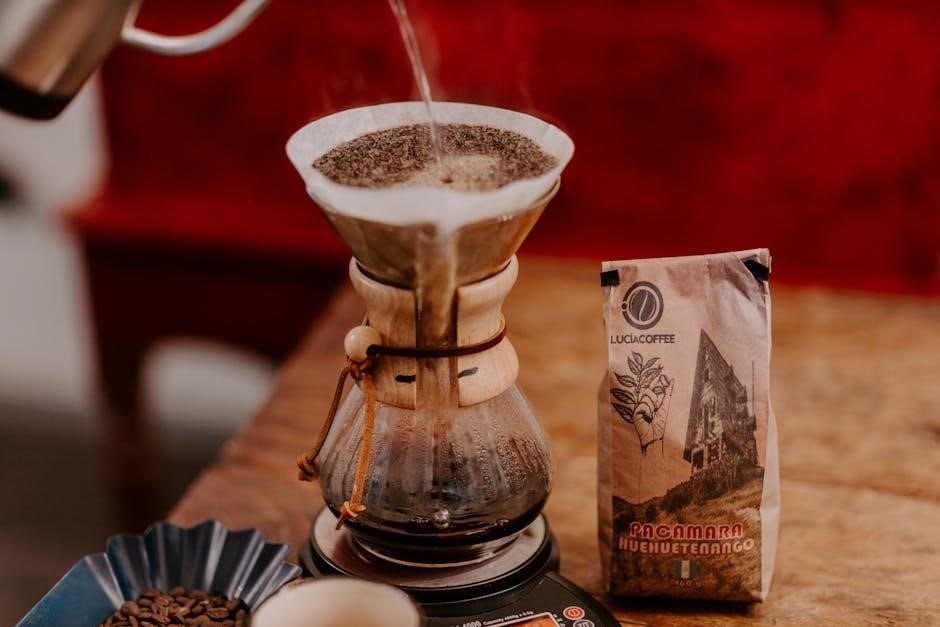
The brewing process begins with rinsing the filter to remove any paper taste and preheating the Chemex․ Add freshly ground coffee, then bloom by pouring a small amount of water to saturate the grounds․ Allow the coffee to bloom for about 30 seconds to release CO2․ Next, pour water in stages, starting from the center and spiraling outward to evenly saturate all grounds․ Pour in a circular motion to ensure consistent extraction․ After each pour, pause briefly to allow the coffee to draw down․ Continue until you reach the desired water level․ Finally, let the coffee finish dripping, ensuring all liquid is extracted․ This method ensures a balanced and flavorful cup of coffee, highlighting the unique characteristics of the beans․ The process is straightforward but requires attention to detail to achieve the best results․ Proper technique and timing are key to unlocking the full potential of your coffee․ By following these steps carefully, you can consistently brew a delicious and satisfying cup using the Chemex․
3․1 Rinsing the Filter
Rinsing the filter is the first step in the brewing process․ Place the Chemex filter in the brewer, ensuring the side with three layers is against the spout․ Pour hot water through the filter to remove any paper taste and to preheat the glass․ This step is crucial for ensuring a clean and even extraction․ Discard the rinsed water and proceed․ The filter should be evenly placed to prevent any channeling during brewing․ Proper rinsing ensures the coffee grounds bloom evenly and prevents unwanted flavors․ This simple step sets the stage for a balanced and delicious cup of coffee․ Always use fresh, filtered water for rinsing to maintain optimal flavor․
3․2 Adding Coffee Grounds
After rinsing the filter, add freshly ground coffee to the Chemex․ Use a medium-coarse grind, as this allows for the optimal extraction․ Pour the grounds evenly into the filter, ensuring the surface is flat․ For a standard 6-cup brewer, use approximately 36 grams of coffee․ Hold the grinder or container close to the filter to prevent spills․ Gently shake the brewer to level the grounds, ensuring even extraction․ The coffee should form a flat, even bed․ This step is critical for achieving a balanced flavor․ Use fresh, high-quality beans for the best results․ Avoid overfilling, as this can lead to uneven extraction and a bitter taste․
3․3 Blooming the Coffee
Pour approximately 50 grams of hot water (around 205°F) over the coffee grounds in a circular motion․ This step, called blooming, allows the coffee to release trapped gases and prepares it for even extraction․ Let it bloom for 30-45 seconds․ During this time, you may hear a gurgling sound as CO2 escapes․ Use a spoon or the water kettle to gently agitate the grounds, ensuring all are saturated․ After blooming, the coffee should appear fluffy and aromatic․ This crucial step enhances flavor and ensures a balanced brew․ Avoid over-blooming, as it can lead to under-extraction․ Once bloomed, proceed to the next stage of pouring․ The bloom sets the stage for a perfect extraction․

3․4 Pouring in Stages
After blooming, pour hot water in a circular motion, starting from the center and moving outward․ Initially, add water to cover the grounds evenly, then pause briefly․ Continue pouring in stages, ensuring the water level rises gradually but doesn’t overflow․ Pour in three distinct stages, allowing the water to flow evenly over all grounds․ The first pour should saturate the coffee, the second should fill to about halfway, and the final pour should reach the desired water level․ Maintain a steady flow to prevent channeling․ The total brewing time should be around 4 minutes, with the last pour completed by the 1-minute mark․ This method ensures balanced extraction and a flavorful brew․
3․5 Allowing the Coffee to Draw Down
Once the final pour is complete, allow the coffee to draw down through the filter․ This step is crucial for even extraction and a balanced flavor․ The coffee should drip slowly, and the bed should remain flat and even․ Avoid stirring or disturbing the grounds during this process․ The draw-down phase typically takes about 3-4 minutes, depending on the coarseness of the grind․ When the last drops fall, your coffee is ready․ The result is a clean, smooth brew with no sediment, showcasing the Chemex’s signature clarity․ This final step ensures all the flavors have been evenly extracted, leaving you with a perfect cup․
Key Tips for a Perfect Brew
Use fresh, high-quality beans, ensure precise measurements, and maintain optimal water temperature․ Monitor grind size for even extraction and avoid over-extraction for a balanced flavor․
4․1 Coffee-to-Water Ratio
Achieve a balanced brew by using a 1:16 to 1:17 coffee-to-water ratio․ For a standard 6-cup Chemex, use 36 grams of coffee with 600 ml of water․ Adjust to suit your taste preferences, but this ratio ensures optimal extraction․ Maintain consistency for a perfect cup every time, and experiment slightly if needed for different roasts or beans․
4․2 Grind Size and Its Impact
The grind size plays a crucial role in achieving the perfect Chemex brew․ Aim for a medium-coarse grind, similar to kosher salt, to ensure proper extraction․ A grind that’s too fine can lead to over-extraction and a bitter taste, while a grind that’s too coarse may result in under-extraction and a weak cup․ Consistency is key, as uneven grinds can disrupt the balance of flavors․ Use a burr grinder for precise control, as blade grinders can generate heat and create inconsistent particles․ Adjusting the grind size based on the coffee beans and roast level will help you achieve the ideal extraction and a flavorful cup every time․
4․3 Positioning the Filter Correctly
Properly positioning the Chemex filter is essential for an even extraction․ Place the filter with the three-layered side aligned against the spout to prevent any coffee grounds from spilling over․ Ensure the filter is snug and evenly spread across the glass container to avoid channeling․ Pre-wet the filter with hot water to eliminate any paper taste and allow it to adhere securely to the walls of the brewer․ This step ensures that the coffee grounds are evenly saturated during the brewing process, leading to a balanced extraction․ Proper filter placement is key to achieving a clean and flavorful cup of coffee with the Chemex method․
Equipment and Accessories
The Chemex brewer, square filters, and complementary tools like grinders and kettles are essential for a seamless brewing experience․ Invest in high-quality equipment for optimal results․
5․1 Chemex Brewer Sizes
The Chemex brewer is available in various sizes, including 6-cup, 8-cup, and 10-cup models, catering to different serving needs․ Each size maintains the iconic glass design and functionality․
The 6-cup is ideal for small gatherings, while the 10-cup suits larger groups․ All sizes feature a sturdy, heat-resistant glass construction with a wooden handle for comfortable pouring․
5․2 Filter Options and Maintenance
Chemex filters are specifically designed to ensure optimal extraction and flavor; They come in square and round shapes, each offering unique benefits․ Regularly replacing filters ensures freshness and prevents buildup․
Maintenance involves rinsing filters thoroughly before use to eliminate any paper taste․ Cleaning the brewer with mild soap and warm water after each use keeps it in prime condition․ Proper care extends the brewer’s longevity and maintains coffee quality․
Mastering the Chemex brew method unlocks a world of flavorful, clean, and balanced coffee․ By following the steps and tips outlined in this guide, you can consistently achieve a perfect cup tailored to your taste preferences․
Remember, practice makes perfect, so experiment with ratios, grind sizes, and techniques to refine your brewing skills․ The Chemex is a timeless brewer that rewards patience and attention to detail, offering a deeply satisfying coffee experience every time․