
The Discovery Mindblown Microscope Set is an educational tool designed for young explorers‚ offering a gateway to the fascinating world of microscopy. With prepared slides and adjustable magnification‚ it transforms everyday objects into extraordinary views‚ inspiring curiosity and learning.
1.1 Overview of the Microscope Set and Its Features
The Discovery Mindblown Microscope Set is a comprehensive 48-piece kit designed for beginners‚ offering magnification up to 450x. It includes prepared slides‚ specimen samples‚ and essential tools for microscopy. The set features a sturdy‚ lightweight design with adjustable focus and a built-in light source. Ideal for children aged 8+‚ it encourages hands-on learning and exploration of microscopic worlds‚ transforming ordinary objects like onion peels and pollen into fascinating views.

1.2 Importance of Following the Instructions
Following the instructions is crucial for safe and effective use of the Discovery Mindblown Microscope Set. Proper assembly ensures functionality‚ while adherence to safety guidelines prevents damage or injury. Instructions provide step-by-step guidance for preparing slides‚ adjusting focus‚ and using magnification correctly. This ensures clear observations and enhances the learning experience‚ especially for children aged 8+‚ fostering scientific exploration and discovery in a structured manner.

Unboxing and Inventory of the Microscope Set
Unbox your Discovery Mindblown Microscope Set and verify all components‚ including the microscope‚ slides‚ samples‚ batteries‚ and instructions‚ to ensure everything is included and undamaged.
2.1 List of Components Included in the Kit
The Discovery Mindblown Microscope Set includes a microscope with multiple magnification settings‚ prepared slides‚ assorted samples‚ a slide kit‚ carrying case‚ 28-piece accessory kit‚ and a detailed learning guide. Additional items like batteries‚ a stage clip‚ and focus knobs are also provided to ensure a complete microscopy experience for young scientists.
2.2 Checking for Any Missing or Damaged Parts
Before starting‚ verify all components are included and undamaged. Check the microscope‚ slides‚ samples‚ stage‚ focus knobs‚ and accessories. Ensure the light source and batteries are functional. If any parts are missing or damaged‚ contact customer support immediately. Proper inspection ensures a smooth and enjoyable microscopy experience for users of all ages.

Setting Up the Microscope
Place the microscope on a stable‚ flat surface. Follow the instructions to assemble the microscope‚ ensuring all parts are securely attached. Install the batteries and test the light source to confirm it is working properly before use.
3.1 Choosing a Suitable Location for the Microscope
Select a stable‚ flat surface for the microscope‚ away from drafts and vibrations. Ensure the area is well-lit and accessible for comfortable viewing. Avoid placing it near windows or busy spaces to minimize disturbances during observation. Proper placement ensures optimal performance and ease of use for all users.
3.2 Assembling the Microscope According to the Instructions
Begin by carefully unpacking all components and referencing the manual. Use the provided screwdriver to secure the eyepiece and attach the objective lens. Align the stage clips and light source properly. Follow the step-by-step guide to ensure correct assembly. Handle delicate parts with care to avoid damage. Double-check all connections before use to ensure proper functionality and a clear viewing experience.
3.3 Installing the Batteries and Testing the Light Source
Insert two AA batteries into the battery compartment‚ ensuring they are placed correctly according to the polarity markings. Close the compartment securely. Turn on the microscope and check if the light source illuminates evenly. If the light is dim or uneven‚ adjust the brightness or replace the batteries. Use a microfiber cloth to clean the light source for optimal clarity before first use.

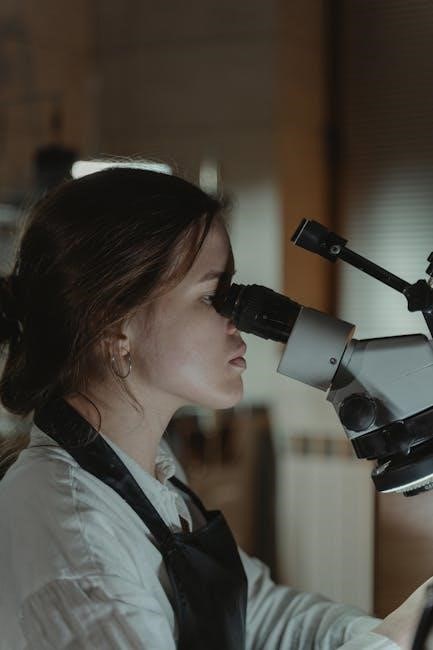
Using the Microscope for the First Time
Start with low magnification to get accustomed to focusing. Prepare slides and samples to explore microscopic specimens with clarity and precision.
4.1 Preparing Slides and Samples for Observation
Preparing slides and samples is essential for a successful microscopy experience. Use the provided prepared slides or create your own by placing specimens on a slide and securing them with clips. Handle samples gently to avoid damage. Position the slide on the stage‚ ensuring it is centered and securely held. Clean the slide with a microfiber cloth before observation. Start with low magnification to focus on the specimen before adjusting to higher settings.
4.2 Starting with Low Magnification and Adjusting Focus
Begin with the lowest magnification setting to locate and center your specimen. Turn the objective turret to the lowest power lens. Use the coarse focus knob to bring the specimen into view‚ then fine-tune with the fine focus knob for clarity. Be patient and adjust gently to avoid moving the slide. Once focused‚ higher magnifications can be explored for greater detail.

Focusing and Adjusting the Microscope
Mastering focus and adjustments is key to clear microscopy. Start with low magnification‚ then fine-tune with focus knobs for sharp‚ detailed images of specimens.
5.1 Understanding the Objective Lenses and Their Magnifications
The Discovery Mindblown Microscope features multiple objective lenses‚ each offering different magnification levels. The 15x lens provides a wide view‚ while higher magnifications like 300x reveal finer details. Understanding each lens’s power ensures you select the right tool for observing various specimens‚ from everyday objects to intricate biological samples‚ enhancing your microscopy experience with clarity and precision.
5.2 Properly Adjusting the Focus Knobs for Clear Images
To achieve clear images‚ start with the lowest magnification lens. Use the coarse focus knob to bring the specimen into approximate focus. Gently adjust the fine focus knob for sharpness. Ensure the sample is centered and the light source is optimized. Avoid over-tightening or forcing adjustments‚ as this may damage the microscope. Patience and precise movements are key to obtaining crisp‚ clear observations every time.

Tips for Effective Microscopy
Start with low magnification to locate specimens‚ then switch to higher settings for detailed views. Use prepared slides for consistent results and clean the lens regularly for clarity.
6.1 Best Practices for Observing Different Specimens
Begin with low magnification to locate specimens‚ then gradually increase for detailed views. Use prepared slides for consistent results and handle fragile samples gently. Clean the lens regularly for clarity and avoid touching slide surfaces to prevent smudging. Store specimens in a cool‚ dry place to preserve their integrity. Always follow safety guidelines when handling sharp or delicate materials.
6.2 Maintaining the Microscope and Its Accessories
Regularly clean the microscope lens with a microfiber cloth and distilled water to ensure clarity. Store the microscope in a dry‚ cool place to prevent mold or dust buildup. Handle slides and accessories with care to avoid breakage. Replace batteries when the light dims‚ and turn off the light source when not in use to conserve power. Check for loose parts periodically and tighten them as needed.

Safety Precautions and Guidelines
Handle the microscope with care to avoid damage. Avoid touching lenses with bare hands to prevent smudging. Keep the microscope out of reach of young children. Always supervise children during use and ensure they follow safety rules. Store the microscope in a safe‚ dry location after use.
7.1 Safety Rules for Handling the Microscope and Samples
Always handle the microscope and its components with care to prevent damage. Avoid touching lenses to prevent smudging. Ensure samples are prepared safely‚ avoiding harmful substances. Use gloves when handling unknown specimens. Keep the microscope out of reach of young children. Supervise children during use to ensure they follow safety guidelines. Properly store the microscope in a dry‚ stable location after use to maintain its functionality and longevity.
7.2 Supervision Requirements for Children
Adult supervision is essential when children use the microscope to ensure safety and proper handling. The set is recommended for children aged 8 and older‚ but younger users may require guidance. Adults should assist with assembling‚ focusing‚ and handling samples to prevent accidents. Supervision also helps children understand and follow safety guidelines‚ fostering a safe and educational experience while exploring microscopy.

Advanced Features of the Mindblown Microscope
The Mindblown Microscope offers advanced features like higher magnification settings and included prepared slides‚ enabling detailed exploration of specimens and enhancing the learning experience for users.
8.1 Exploring Higher Magnification Settings
The Mindblown Microscope allows users to explore higher magnification settings‚ revealing intricate details of specimens. With magnifications ranging from 50x to 450x‚ it enables a deeper understanding of microscopic structures. This feature is particularly useful for examining complex samples like pollen‚ crystals‚ or tiny organisms. By adjusting the objective lenses‚ users can transition smoothly between magnification levels‚ uncovering new details at each stage. This advanced capability makes it an excellent tool for both beginners and enthusiasts‚ fostering a sense of discovery and curiosity.
8.2 Using the Included Prepared Slides and Samples
The Mindblown Microscope Set comes with prepared slides and samples‚ offering a convenient way to start exploring microscopy. These slides feature diverse specimens‚ such as pollen‚ crystals‚ and biological samples‚ showcasing microscopic details. Users can observe these samples with ease‚ gaining hands-on experience. The included materials are designed to inspire curiosity and provide a foundation for further scientific investigation‚ making the learning process engaging and accessible for users of all skill levels.
Troubleshooting Common Issues
Common issues include focus and clarity problems‚ often resolved by adjusting the focus knobs or cleaning the lens. Lighting issues may require checking the bulb or power source.
9.1 Resolving Focus and Clarity Problems
If your microscope image appears blurry‚ ensure the slide is properly prepared and the objective lens is clean. Adjust the focus knobs slowly‚ starting with coarse focus. If issues persist‚ check for debris on the lens or stage and clean with a microfiber cloth. Proper alignment and illumination are key for clear observation.
9.2 Addressing Lighting Issues
If the light source is dim or not working‚ check the batteries and ensure they are correctly installed. Replace them if necessary. Clean the LED light with a soft cloth to remove any dust or debris. Adjust the brightness using the built-in controls for optimal illumination. If issues persist‚ consult the user manual or contact customer support for further assistance.
Congratulations on completing the guide! The Discovery Mindblown Microscope Set is a powerful tool for fostering curiosity and learning. Encourage young explorers to continue discovering the microscopic world‚ sparking a lifelong passion for science and exploration. Happy discovering!
10.1 Encouraging Users to Continue Exploring Microscopy
Encourage users to delve deeper into microscopy by exploring diverse specimens and experimenting with higher magnifications. Motivate them to share discoveries and maintain their microscope for prolonged use. Emphasize the joy of uncovering hidden details‚ fostering curiosity and scientific inquiry. This tool not only educates but also inspires a lifelong appreciation for the microscopic world and its endless wonders. Happy exploring!