
Pro1 T701 Manual: Comprehensive Guide
This guide details operation‚ installation‚ and troubleshooting for Pro1 T701 thermostats – both programmable and non-programmable models – alongside warranty details․
The Pro1 T701 thermostat series offers reliable temperature control for standard 24-volt heating and air conditioning systems‚ including heat pumps without auxiliary or emergency heat․ Available in both programmable and non-programmable versions‚ the T701 caters to diverse user preferences and energy management goals․ This manual provides comprehensive instructions for operation‚ installation‚ and troubleshooting‚ ensuring optimal performance and longevity of your thermostat․
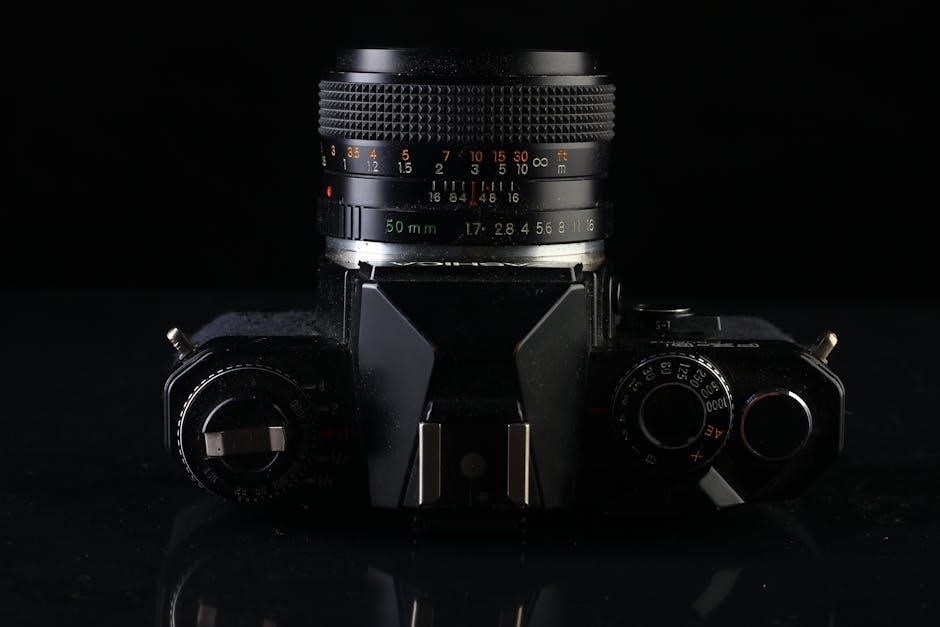
Understanding your T701’s specific model – programmable or non-programmable – is crucial for utilizing its full potential․ The thermostat features a user-friendly interface with a clear LCD display‚ intuitive fan and system switch settings‚ and precise temperature control capabilities․ Proper installation and adherence to safety precautions are essential for safe and efficient operation․
Understanding Programmable vs․ Non-Programmable Models
The Pro1 T701 series includes both programmable and non-programmable thermostats‚ each designed for different user needs․ Non-programmable models offer simple‚ consistent temperature control with manual adjustments for fan and system settings․ They are ideal for those preferring a straightforward‚ set-it-and-forget-it approach․
Programmable models‚ conversely‚ allow users to create customized heating and cooling schedules based on daily routines․ This feature optimizes energy consumption by automatically adjusting temperatures when a space is unoccupied or during sleep hours․ Programmable thermostats offer greater control and potential cost savings‚ though require initial setup and occasional adjustments to maintain optimal efficiency․ Choosing the right model depends on your lifestyle and energy-saving priorities․
Thermostat Operation
This section details how to effectively use your Pro1 T701 thermostat‚ covering the LCD display‚ fan and system switches‚ and temperature adjustments․
LCD Display Overview
The Pro1 T701 thermostat features a clear LCD display designed for easy readability‚ even in low-light conditions‚ often incorporating a glow-in-the-dark light button for enhanced visibility․ The display prominently shows the current room temperature‚ alongside the setpoint temperature – the desired temperature the thermostat is working to achieve․
Users can readily identify the current operating mode‚ indicated by icons representing heating‚ cooling‚ or auto settings․ The display also indicates fan operation status (auto or on)․ Furthermore‚ the LCD provides visual cues regarding battery levels‚ alerting users when replacement is necessary․ Understanding these displayed elements is crucial for effective thermostat operation and maintaining a comfortable indoor environment․

Fan Switch Functionality
The fan switch on the Pro1 T701 thermostat controls the operation of your HVAC system’s blower fan․ Setting the switch to “Auto” ensures the fan runs only during heating or cooling cycles‚ optimizing energy efficiency and providing consistent temperature distribution․ Selecting “On” forces the fan to run continuously‚ regardless of heating or cooling demand․
Continuous fan operation can improve air circulation and filtration‚ potentially enhancing indoor air quality․ However‚ it also consumes more energy․ The Pro1 T701’s fan switch allows users to tailor fan operation to their specific comfort preferences and energy-saving goals‚ offering a balance between air quality and cost-effectiveness․
System Switch Settings
The System switch on the Pro1 T701 thermostat dictates how your HVAC system operates․ Selecting “Heat” activates the heating function‚ while “Cool” engages the cooling function․ An “Off” setting disables both heating and cooling‚ allowing for fan-only operation if desired․ For heat pump systems without auxiliary or emergency heat‚ proper configuration is crucial․
Incorrect system switch settings can lead to inefficient operation or even equipment damage․ Always verify the correct setting based on the season and your desired climate control․ Refer to the compatibility section to ensure the Pro1 T701 is appropriately configured for your specific HVAC system type for optimal performance․
Temperature Control and Adjustment
The Pro1 T701 thermostat allows precise temperature control using the up and down buttons on the interface․ Each press adjusts the setpoint temperature by one degree․ The current room temperature is prominently displayed on the LCD screen‚ enabling easy comparison with the desired setting․
For programmable models‚ temperature adjustments can be scheduled for different times of the day and days of the week‚ maximizing energy efficiency․ Ensure the thermostat is not exposed to direct sunlight or drafts‚ as this can affect temperature readings․ Consistent‚ accurate temperature control contributes to comfort and reduced energy consumption․

Installation and Setup
Proper installation requires a standard 24-volt HVAC system․ Carefully review wiring diagrams‚ battery information‚ and ensure compatibility before proceeding with setup․
Compatibility with HVAC Systems (24 Volt)
The Pro1 T701 thermostat is designed to work with standard 24-volt heating and air conditioning systems․ It’s specifically compatible with heat pump systems without auxiliary or emergency heat functionality․ Before installation‚ verify your existing HVAC system operates on 24 volts to avoid damage․
This thermostat is not intended for use with line voltage systems (120V or 240V) or systems requiring auxiliary/emergency heat control․ Incorrect wiring or application can lead to equipment malfunction and void the warranty․ Always consult a qualified HVAC technician if you are unsure about your system’s voltage or configuration․ Carefully review your HVAC system’s documentation to confirm compatibility before proceeding with the installation process․
Battery Door Information & Replacement
The Pro1 T701 thermostat requires battery power to maintain settings during power outages and for certain functionalities․ The battery door is typically located on the front or side of the thermostat unit․ To access it‚ gently press or slide the door open‚ following any indicated release mechanisms․
Replace the batteries with fresh alkaline batteries of the correct size (typically AA or AAA – consult the thermostat’s labeling)․ Ensure correct polarity when inserting the new batteries․ A low battery indicator will appear on the LCD display when replacement is needed․ Regularly checking and replacing batteries ensures continuous operation and prevents data loss․
Wiring Diagrams and Connections
The Pro1 T701 thermostat is designed for standard 24-volt HVAC systems․ Proper wiring is crucial for safe and effective operation․ Refer to the detailed wiring diagrams included in this manual or on the Pro1 Technologies website before attempting any connections․ Common terminals include Rh‚ Rc‚ W‚ Y‚ and G․
Incorrect wiring can damage the thermostat or your HVAC equipment․ If you are unfamiliar with electrical wiring‚ consult a qualified HVAC technician․ Always disconnect power to the HVAC system at the breaker before working with the wiring․ Double-check all connections before restoring power to ensure accuracy and safety․

Technical Specifications
The Pro1 T701 operates on 24V AC power‚ features a wide temperature range‚ and has compact dimensions suitable for various mounting locations․
Voltage Requirements
The Pro1 T701 thermostat is specifically designed to operate with standard 24-volt AC power systems commonly found in residential heating and cooling setups․ It’s crucial to verify your HVAC system’s voltage before installation to ensure compatibility and prevent potential damage to the thermostat or the connected equipment․
Using a voltage outside of the specified 24V AC range can lead to inaccurate temperature readings‚ malfunction of the thermostat’s features‚ or even a complete system failure․ Incorrect wiring or a mismatched power supply can pose a safety hazard․ Always consult a qualified HVAC technician if you are unsure about your system’s voltage or the proper wiring procedures․ Proper voltage is essential for reliable performance․
Temperature Range
The Pro1 T701 thermostat is engineered to accurately monitor and control temperatures within a broad operational range‚ typically spanning from 40°F to 90°F (4․4°C to 32․2°C)․ However‚ the effective heating and cooling performance will ultimately depend on the capabilities of your specific HVAC system․
Attempting to maintain temperatures outside this range may result in reduced efficiency or the thermostat’s inability to reach the desired setpoint․ Extreme temperatures can also impact the longevity of the thermostat’s internal components․ It’s important to note that the display range might extend beyond the control range for informational purposes․
Dimensions and Physical Characteristics
The Pro1 T701 thermostat boasts a compact and user-friendly design‚ intended for easy integration into various home or office environments․ Typically‚ the unit measures approximately 4․75 inches in width‚ 3․3 inches in height‚ and 1․2 inches in depth․ These dimensions ensure compatibility with standard wall mounting configurations․
The thermostat’s casing is constructed from durable‚ high-quality plastic‚ designed to withstand everyday wear and tear․ It features a clear‚ easy-to-read LCD display and tactile buttons for intuitive operation․ The overall weight of the unit is relatively light‚ facilitating straightforward installation and minimizing stress on wall surfaces․
Warranty Information
Pro1 provides a manufacturer warranty for the T701 series‚ covering defects in materials and workmanship; details regarding claim processes are included;
Pro1 Manufacturer Warranty Details
The Pro1 manufacturer warranty for the T701 series thermostats covers defects in materials and workmanship under normal use․ This warranty extends for a specified period from the date of original purchase‚ as detailed in the accompanying warranty card or documentation․ It’s crucial to retain proof of purchase for warranty validation․
This warranty does not cover damage resulting from improper installation‚ misuse‚ abuse‚ accidents‚ unauthorized modifications‚ or acts of nature․ Furthermore‚ consequential damages or incidental expenses incurred due to a product failure are not covered․ Pro1’s responsibility is limited to repairing or replacing the defective thermostat‚ at their discretion․ Warranty service requires returning the unit to Pro1 or an authorized service center․
Warranty Claim Process
To initiate a warranty claim for your Pro1 T701 thermostat‚ first gather your original proof of purchase and a detailed description of the defect․ Contact Pro1’s customer support team – details are available on their website or in the product documentation – to obtain a Return Merchandise Authorization (RMA) number․
Carefully package the thermostat‚ including all accessories‚ and ship it to the authorized service center specified by Pro1‚ clearly displaying the RMA number on the package․ Shipping costs are the responsibility of the claimant․ Upon receipt and verification of the defect‚ Pro1 will either repair or replace the thermostat‚ at their discretion‚ and return it to you․

Safety Precautions
Avoid operating the cooling system if outdoor temperatures are low‚ as this could cause equipment damage․ Always follow general safety guidelines during installation․
Equipment Damage Hazard (Cooling System Operation)
Carefully review these precautions to prevent potential damage to your cooling system․ Do not operate the cooling function when outdoor temperatures are nearing or below freezing․ This is a critical safety measure‚ as the system can freeze up‚ leading to compressor failure and costly repairs․
The Pro1 T701 thermostat is designed for standard 24-volt HVAC systems․ Improper operation‚ particularly activating cooling in excessively cold conditions‚ voids the warranty and can cause irreversible harm to the equipment․ Always monitor external temperatures before engaging the cooling mode‚ and ensure appropriate settings are selected․ Prioritize preventative measures to safeguard your investment․
General Safety Guidelines
Prior to installation or servicing‚ always disconnect power to the HVAC system at the breaker panel to avoid electrical shock․ Improper wiring can lead to malfunctions and potential hazards․ Ensure all connections adhere to local electrical codes and regulations․
This thermostat is intended for indoor use only․ Avoid exposing it to direct sunlight‚ extreme temperatures‚ or moisture․ Regularly inspect the wiring for damage or wear․ If you are uncomfortable performing any installation or maintenance tasks‚ consult a qualified HVAC technician․ Always refer to the complete manual for detailed instructions and safety information․

Troubleshooting
This section provides solutions for common issues‚ including display problems and incorrect temperature readings‚ as well as instructions for resetting the thermostat․
Common Issues and Solutions
Display Issues: If the LCD display is blank‚ first check the battery door for proper closure and battery functionality․ Replace batteries if necessary․ A dimly lit display may also indicate low batteries․ For a non-illuminated display‚ ensure the glow-in-the-dark button is adequately charged by exposure to light․
Temperature Discrepancies: Incorrect temperature readings can stem from thermostat placement – avoid direct sunlight or drafts․ Verify the system switch is set to the correct mode (Heat‚ Cool‚ or Auto)․ If the cooling system operates despite appropriate settings‚ a potential equipment damage hazard exists; consult a professional․
System Not Responding: Confirm proper wiring connections according to the wiring diagrams․ Ensure compatibility with standard 24-volt HVAC systems․ If issues persist‚ a thermostat reset might resolve the problem․
Resetting the Thermostat
To reset the Pro1 T701 thermostat‚ begin by ensuring the system switch is in the “Off” position․ Next‚ remove the battery door and completely disconnect the batteries for approximately one minute․ This allows the internal memory to clear‚ effectively resetting the programmed settings․
Reinstall the batteries‚ ensuring correct polarity․ Replace the battery door securely․ After restoring power‚ the thermostat will revert to its factory default settings‚ requiring a new programming setup․ This process can resolve minor operational glitches and restore functionality․
If resetting doesn’t resolve persistent issues‚ consult the warranty information for claim procedures or seek professional HVAC assistance․